4th Quarter
|
UNIT VOCABULARY:
Drawing & Perspective Past: Shape Form Value Highlight & Shadow New: Perspective: the art of drawing solid objects on a two-dimensional surface so as to give the right impression of their height, width, depth, and position in relation to each other when viewed from a particular point. Cylinder: a solid geometric figure with straight parallel sides and a circular or oval cross section. Viewpoint: A viewpoint is the height from which the artist sees the subject they're painting. It determines where the horizon line is. A consistent horizon line is fundamental to accurate perspective in a picture. Remember that the horizon line is always at eye level with the viewer. Render: Rendering in visual art and technical drawing means the process of formulating, adding color, shading, and texturing of an image. It can also be used to describe the quality of execution of that process. Charcoal Pencils: compressed charcoals, burned organic matter, that are wrapped with a layer of wood, like a regular pencil. Gesture Drawing - an energy sketch, gesture drawing is a laying in of the action, form, and pose of a model/figure. Typical situations involve an artist drawing a series of poses taken by a model in a short amount of time, often as little as 10 seconds, or as long as 5 minutes. Contour Drawing: is an artistic technique used in the field of art in which the artist sketches the contour of a subject by drawing lines that result in a drawing that is essentially an outline; the French word contour meaning, “outline.” OBJECTIVES:
A) Students will be able to identify a cylinder within an object to be drawn. B) Students will be able to Draw a cylinder from varying viewpoints. C) Students will be able to create a Gesture Sketch of an object D) Students will be able to create a Gesture sketch in combination with their knowledge of Cylinders to draw a hand E) Students will be able to draw a hand and render the values using white and black charcoal pencils. Art techniques;
Paper used with artists' charcoal can vary in quality. Rough texture may allow more charcoal to adhere to the paper. The use of toned paper allows different possibilities as white pastels can be used in combination with charcoal to create contrast. Hatching; It is a method in which thin, dark lines are continuously placed parallel to each-other. When done with charcoal, it comes out smoother and darker. Rubbing; Rubbing is done with a sheet of paper pressed against the targeted surface then rubbing charcoal against the paper. It creates an image of the texture of the surface. Blending; Blending is done to create smooth transitions between darker and lighter areas of a drawing. It can also create a shadow effect. Two common methods of blending are, using a finger to rub or spread charcoal which has been applied to the paper or the use of paper blending stumps also called a Tortillon. Lifting (Erasing); Erasing is often performed with a kneaded rubber eraser. This is a malleable eraser that is often claimed to be self-cleaning. It can be shaped by kneading it softly with hands, into tips for smaller areas or flipped inside out to "clean". 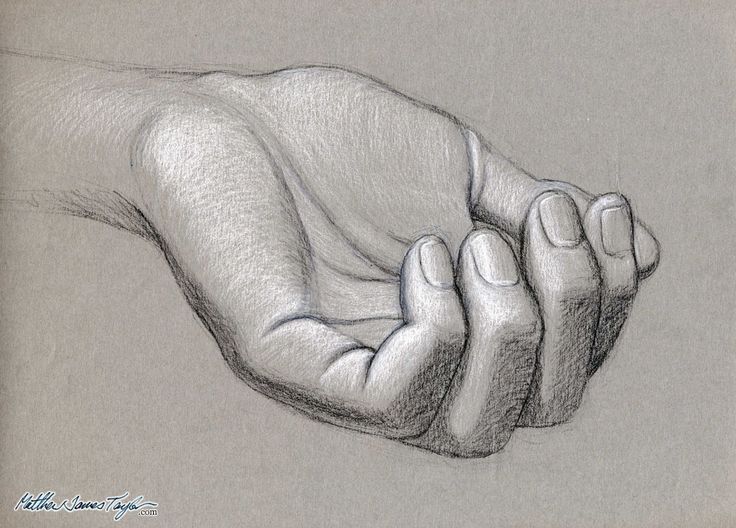
|
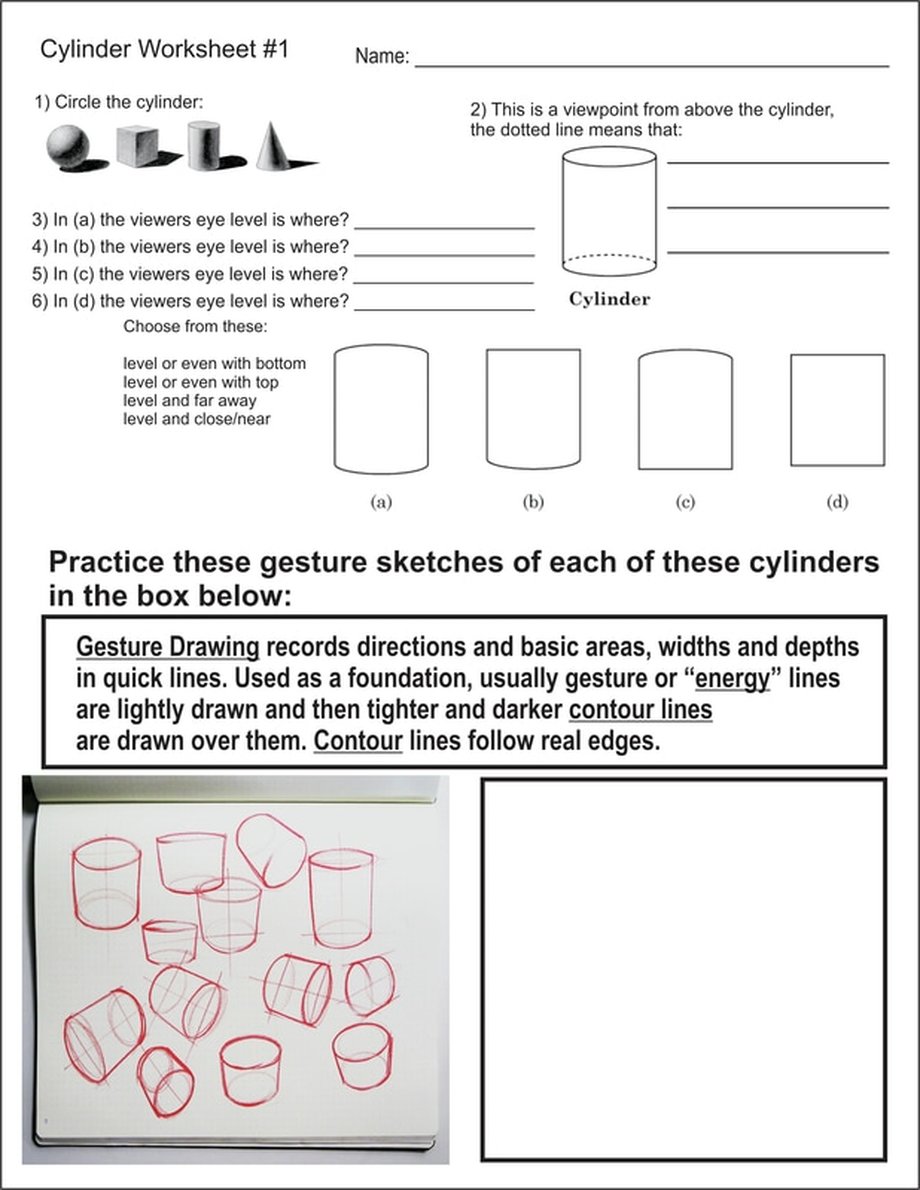
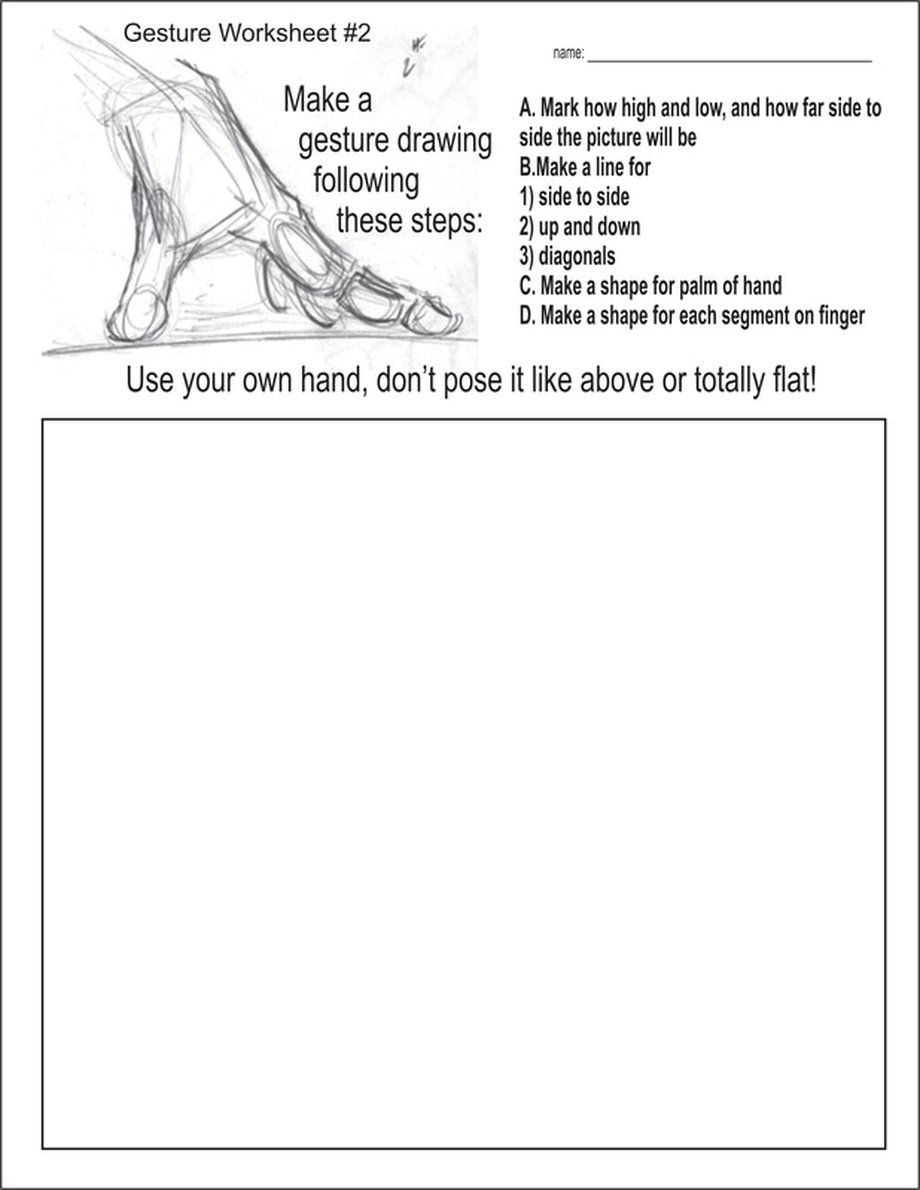
Complete the 5 Worksheets below before the Charcoal Hand Project-you need to learn how to perceive a cylinder and draw them before you proceed to the hand drawings! See the worksheets below, Available in class, or if you are absent download them here and complete them at home:
Watch the Video on how to shade hands: youtu.be/cqtZQXRmleE | ||||||||||
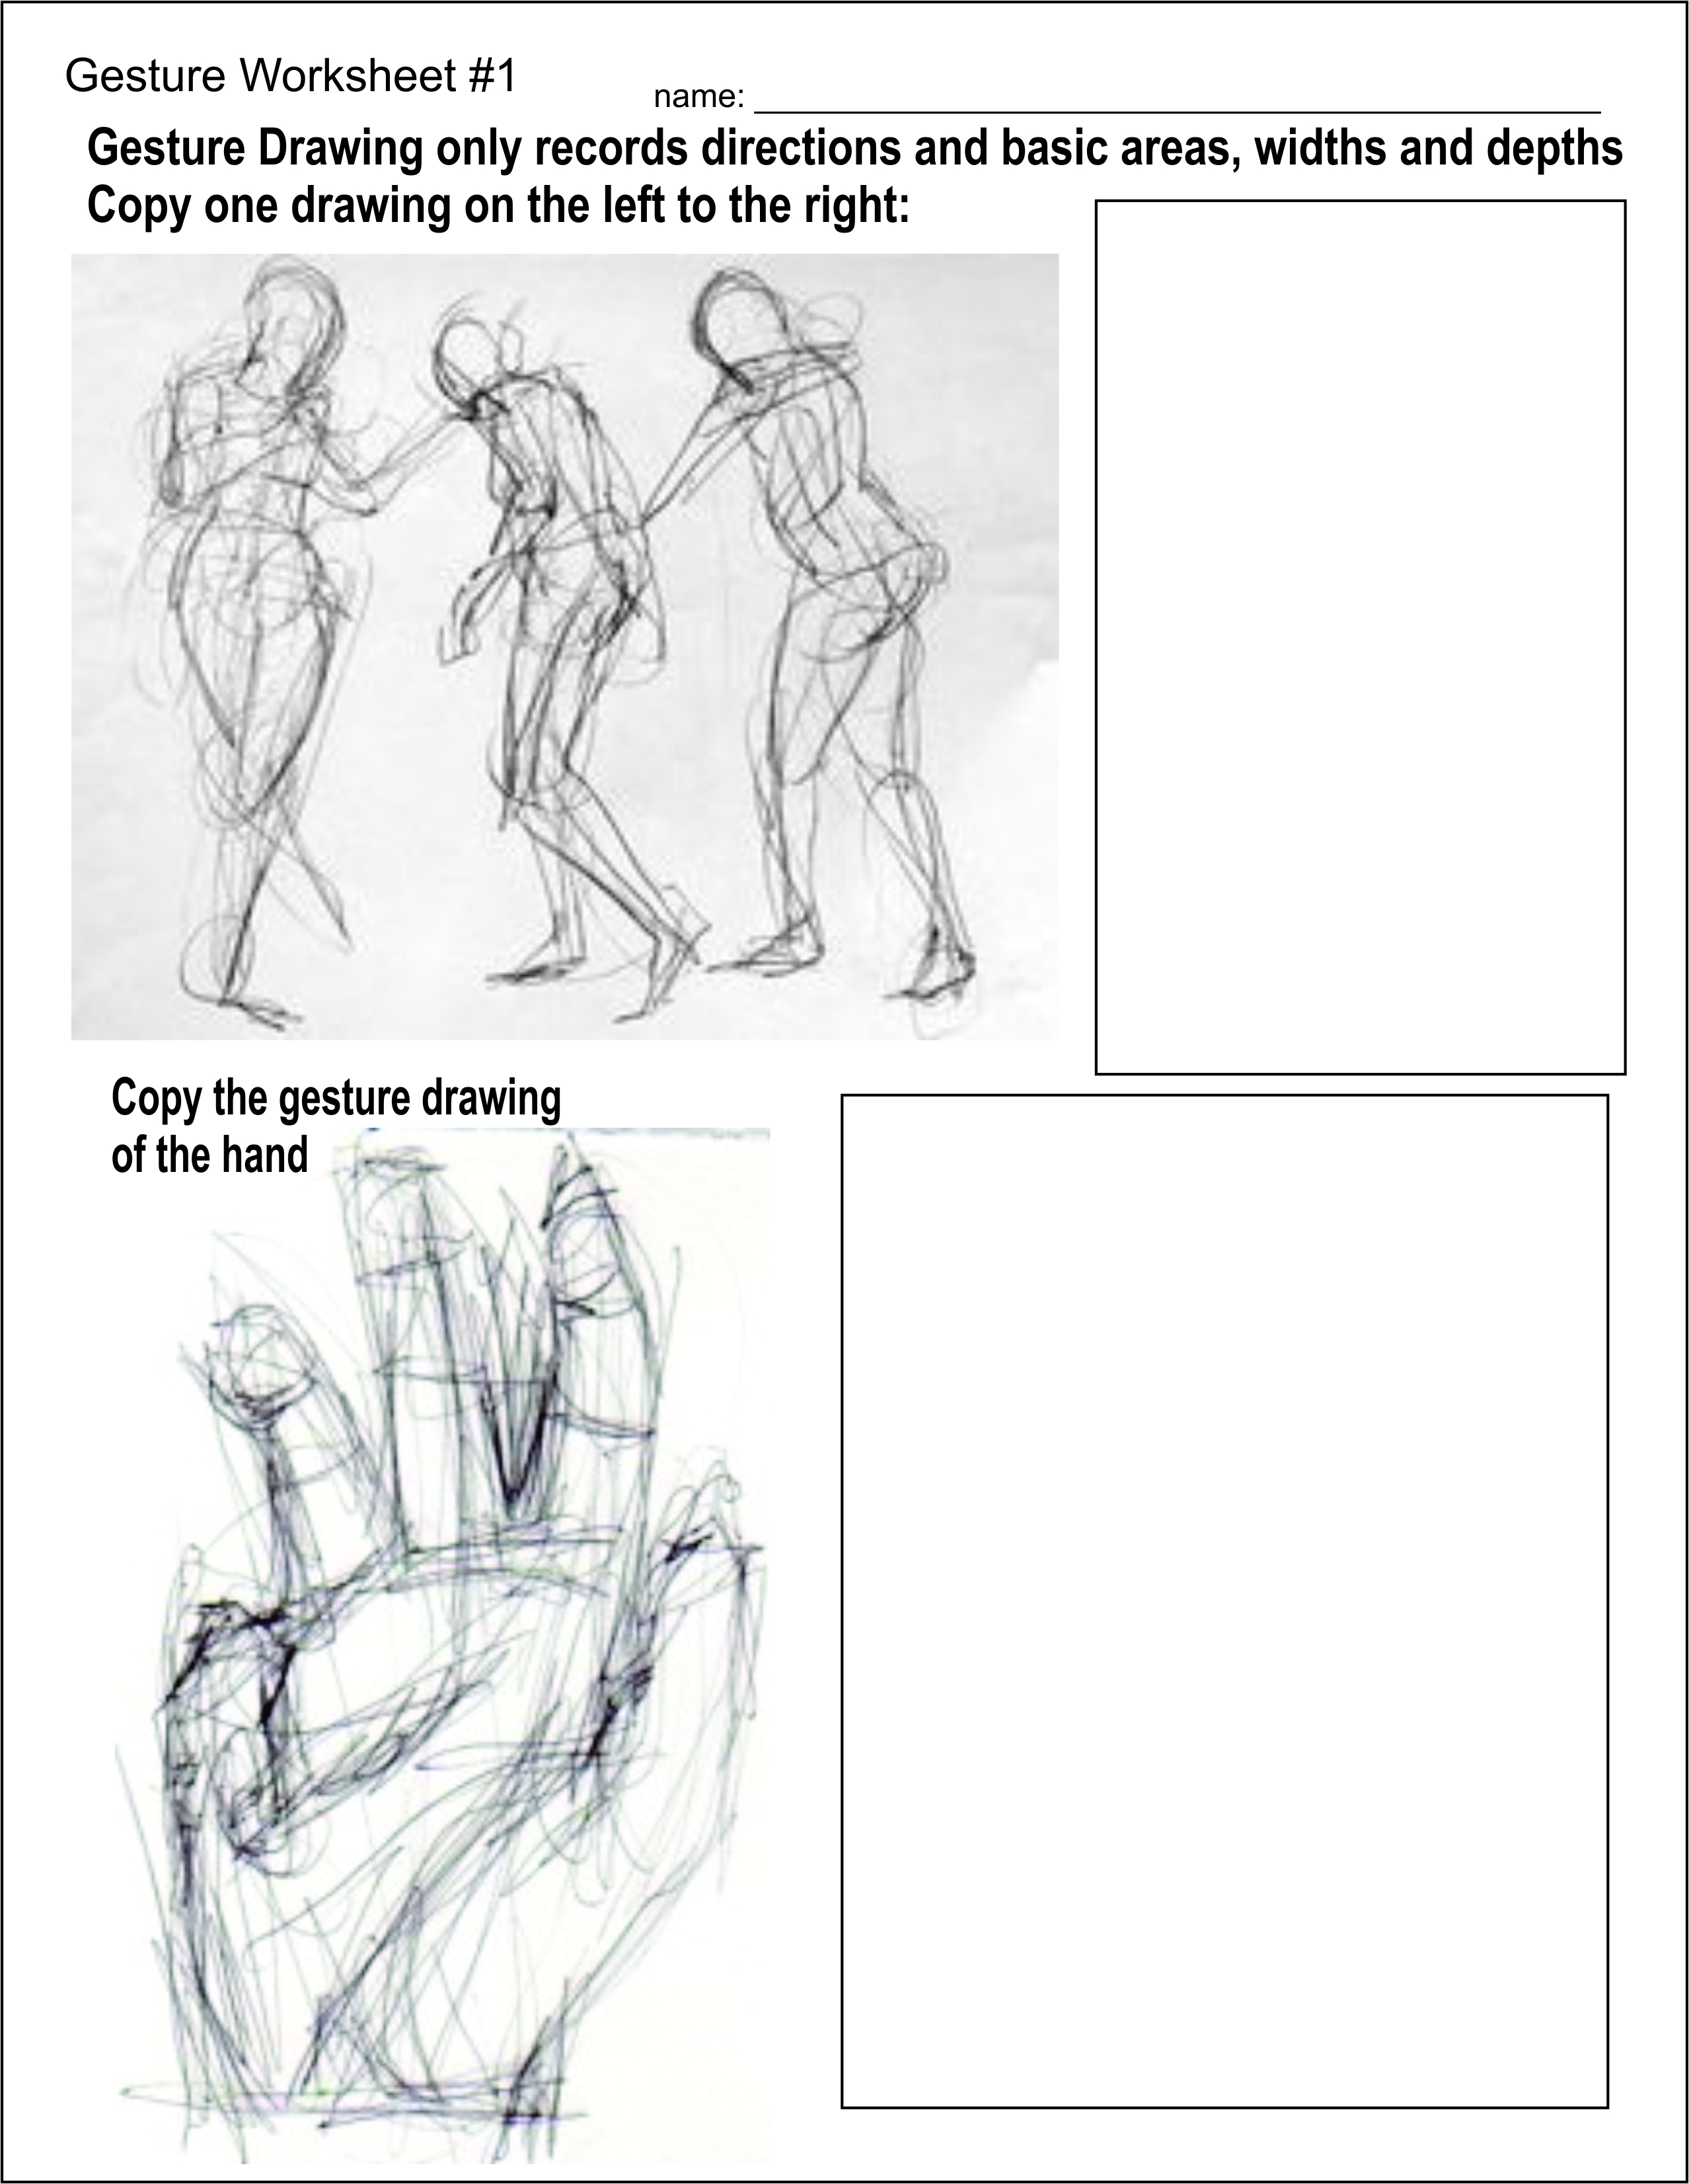
This Worksheet given as your assignment on 4-17-17, is worth 10 points:
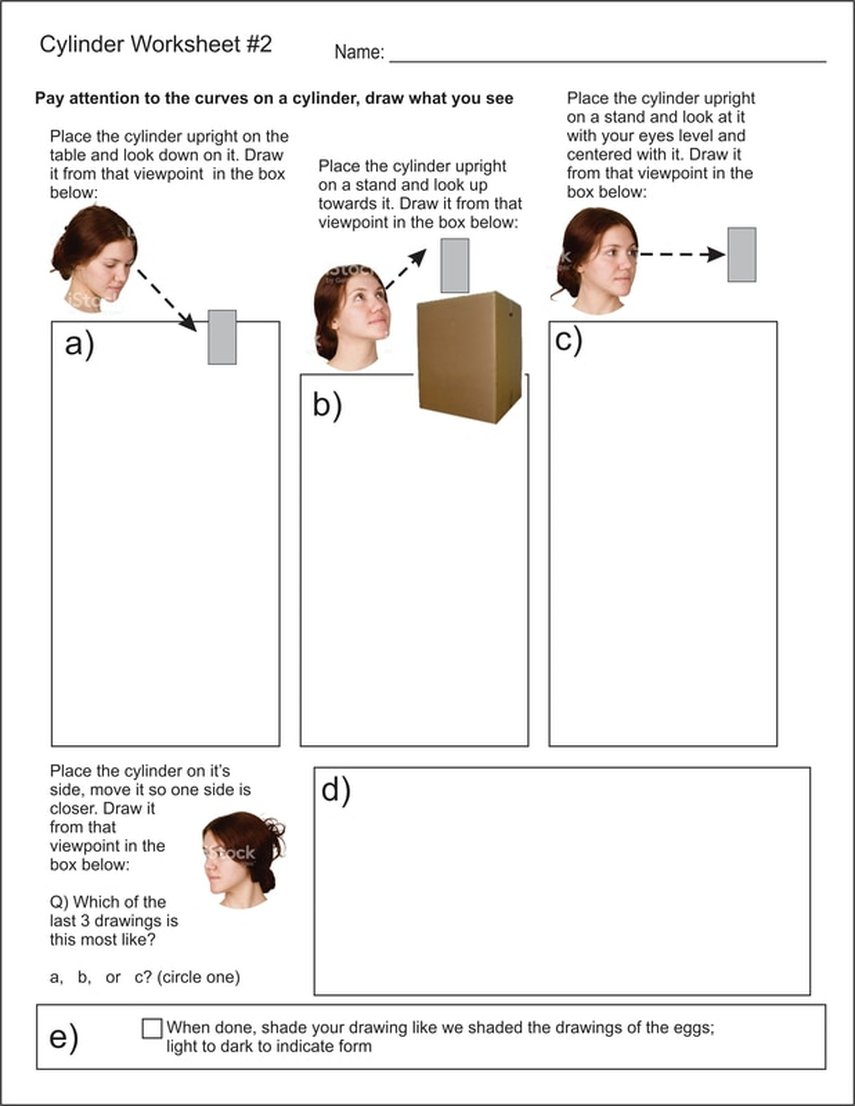
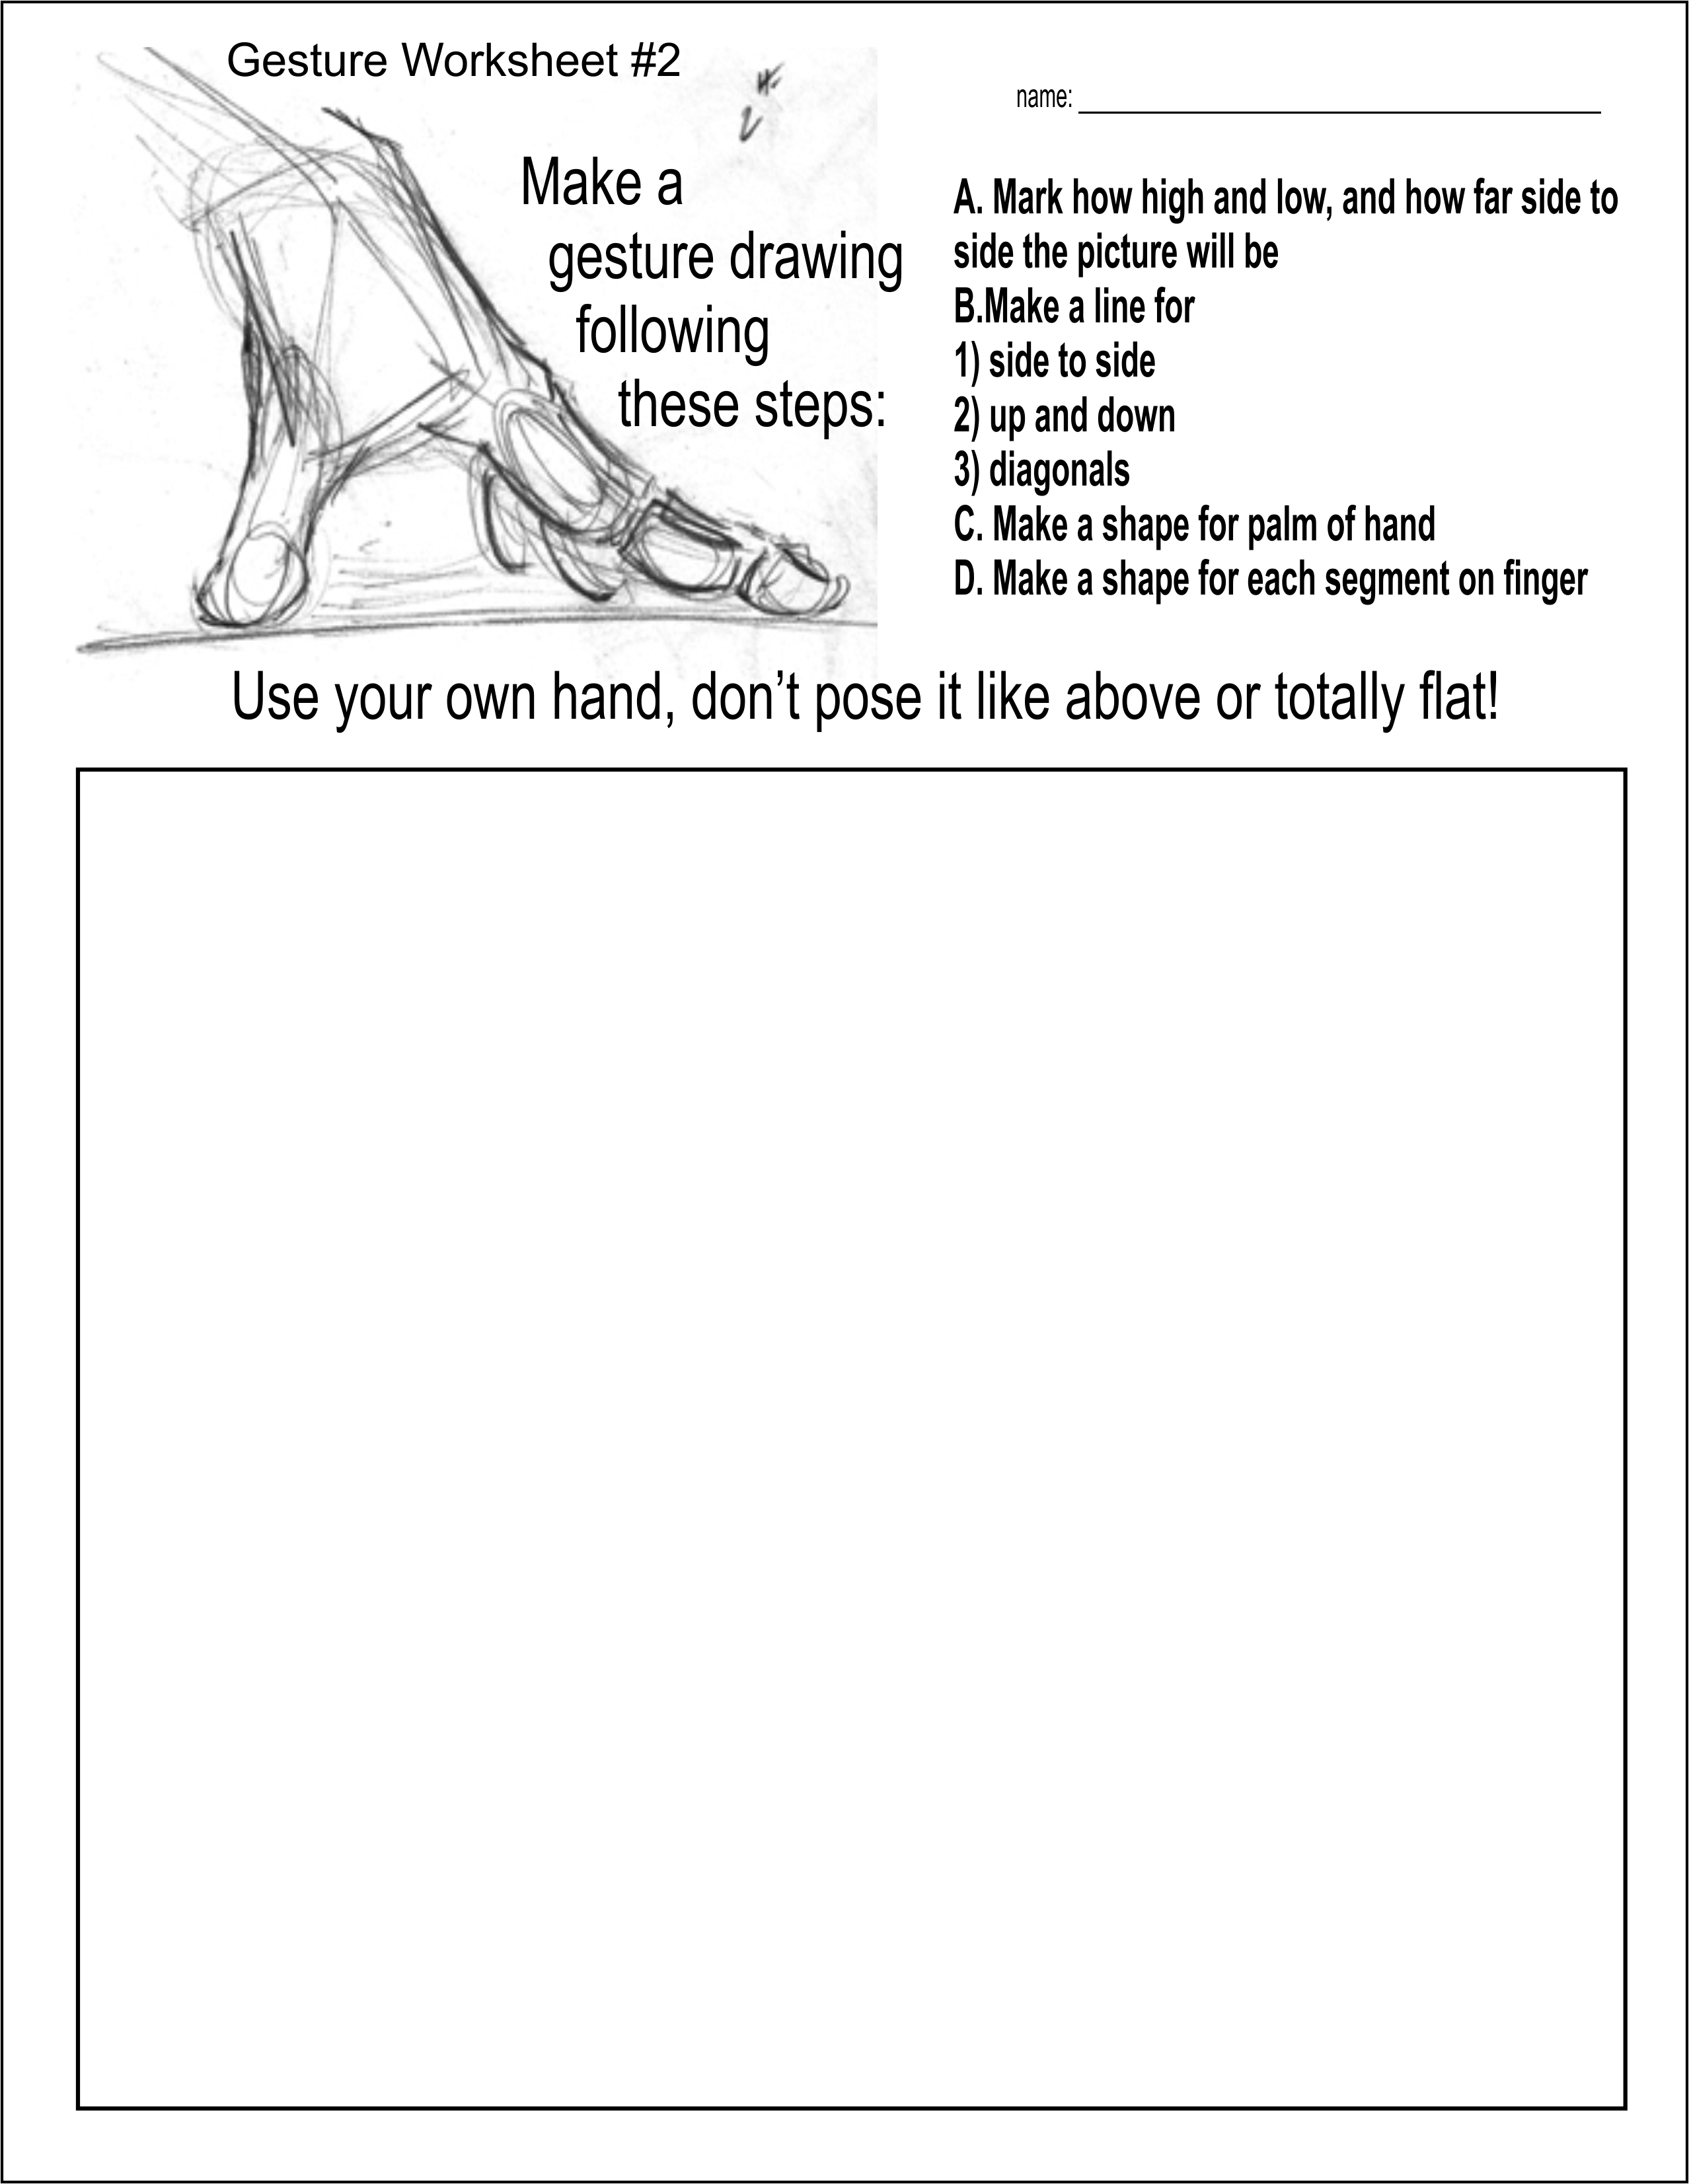
This Worksheet given as your assignment on 4-18-17, is worth 10 points:
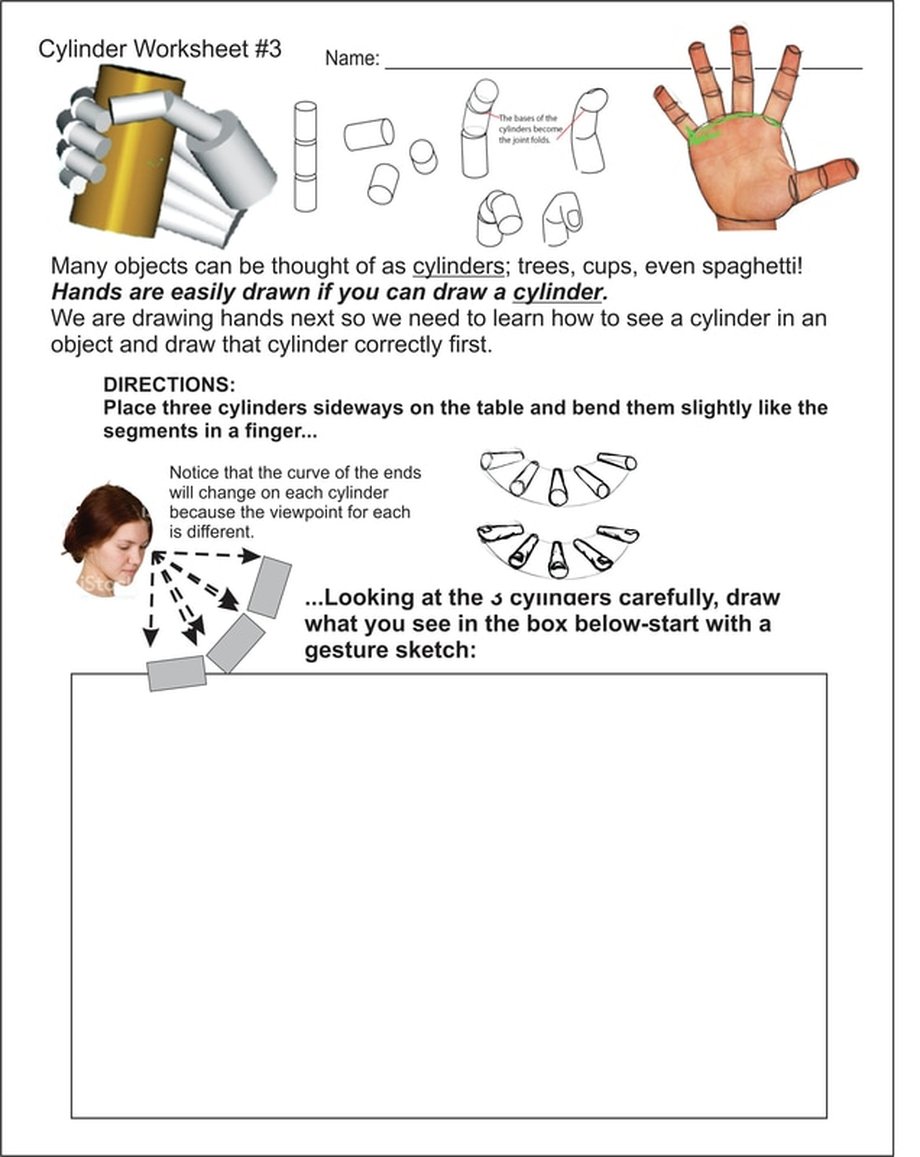
This Worksheet given as your assignment on 4-19-17, is worth 10 points:
This Worksheet given as your assignment on 4-20-17, is worth 10 points:

This Worksheet given as your assignment on 4-21-17, is worth 10 points:
After completing the above worksheets, you may proceed with the tasks that lead up to our charcoal drawing:
|
Go to this page on how to draw hands for some quick tips: thevirtualinstructor.com/how-to-draw-hands.html

|
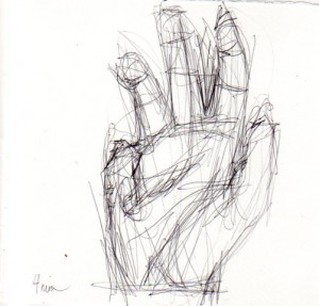
Practice time: Pencil Gesture Sketch
|
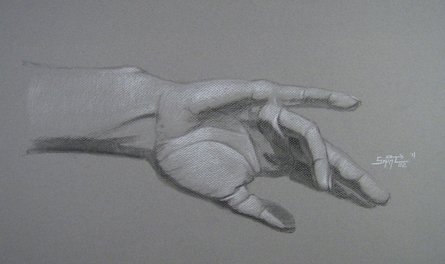
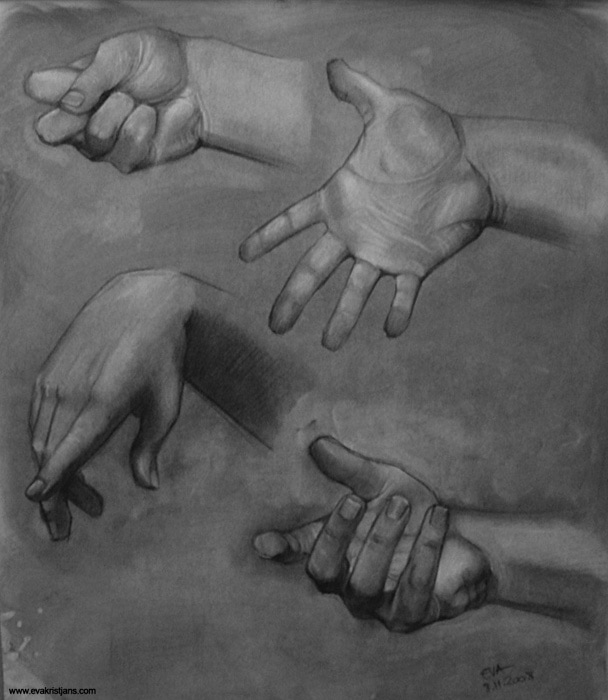
Sample Gesture Drawings:

Task 2 - Gesture drawing Plus contour Drawing:
A Contour Drawing is an artistic technique used in the field of art in which the artist sketches the contour of a subject by drawing lines that result in a drawing that is essentially an outline; the French word contour meaning, “outline.”
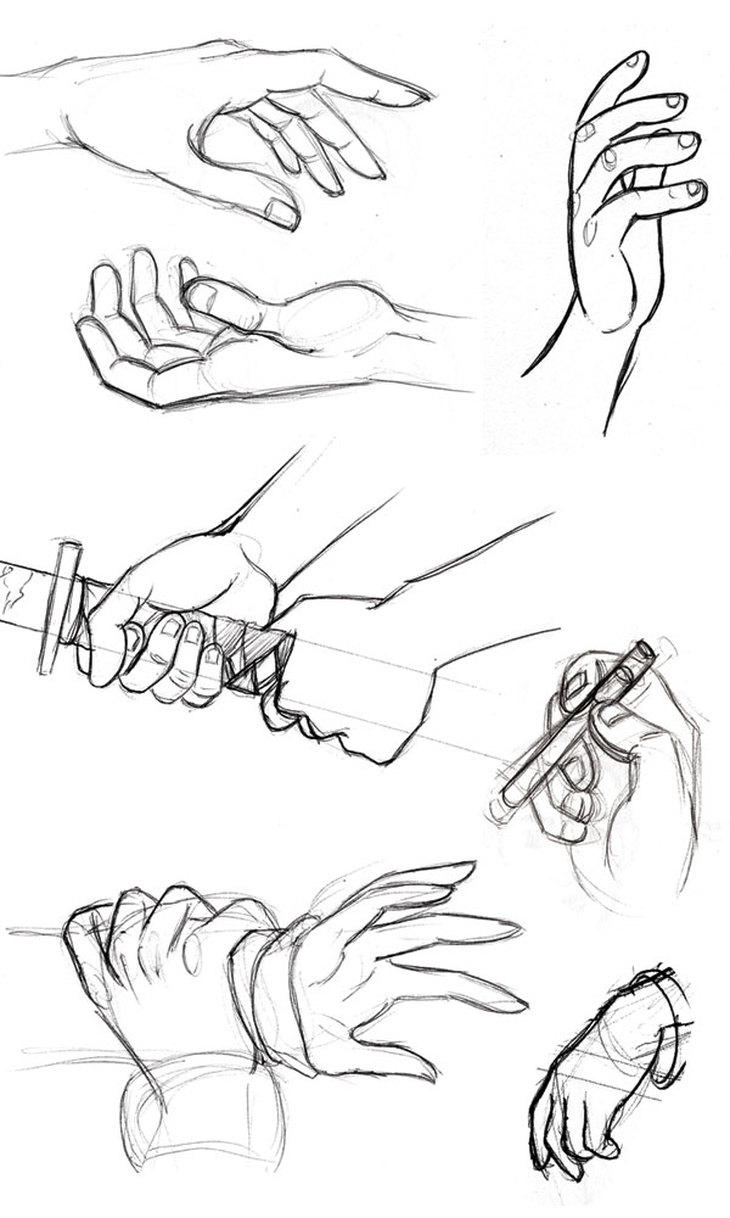
Step #1: Draw a group of 3 gesture drawings of your own hands in various positions and from various angles, making sure to deconstruct them into the simplest possible forms (the equivalent of drawing a stick figure and then fleshing it out). Start with the energy or gesture sketch and build on that before finally refining the details. Draw lightly, using light pressure.
Step #2: Add a contour drawing around the forms to finalize the drawings.
In the sketches below the under-sketch (gesture drawing) is very light but in some you can just see the broad simple shapes used.
Task 3 - 3 Charcoal Studies: Choosing your best 3 poses, combine the drawings either by transferring the image or by re-sketching onto new paper then rendering the values using black and white charcoal pencils to create shadows and highlights. We will be using gray charcoal paper so the white highlights look nice and bright compared to the base color of the paper. We will build up the contrast to make the drawings exciting and dynamic.
Optional: Some students may want to take photographs of their hands with their cell phones and print them out to have the reference more easily copied from. We can do this in class. I would still consider this a drawing from observation because you would be still observing the image and drawing from it, and always could refer to the real hand for detail.
REFERENCE & TIPS: Basics of the Hand
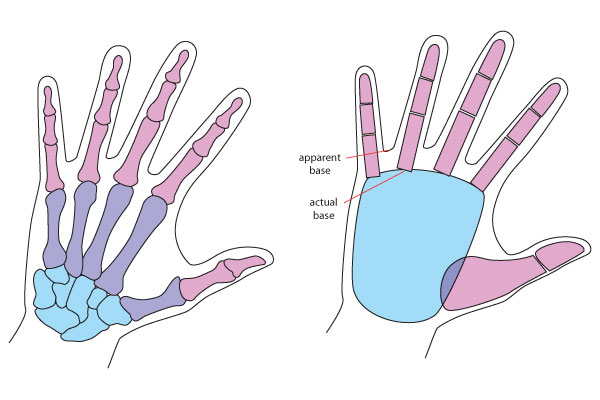
Here’s a quick look at the bone structure of the hand (left). In blue, the eight carpal bones, in purple, the five metacarpal bones, and in pink, the 14 phalanges.
As many of these bones cannot move at all, we can simplify the basic structure of the hand: the diagram on the right is all you really need to remember.
Based on the above, a simple way of sketching the hand is to start with the basic form of the palm, a flat shape (very much like a steak, but roundish, squarish, or trapezoidal) with rounded angles, then attach the fingers :
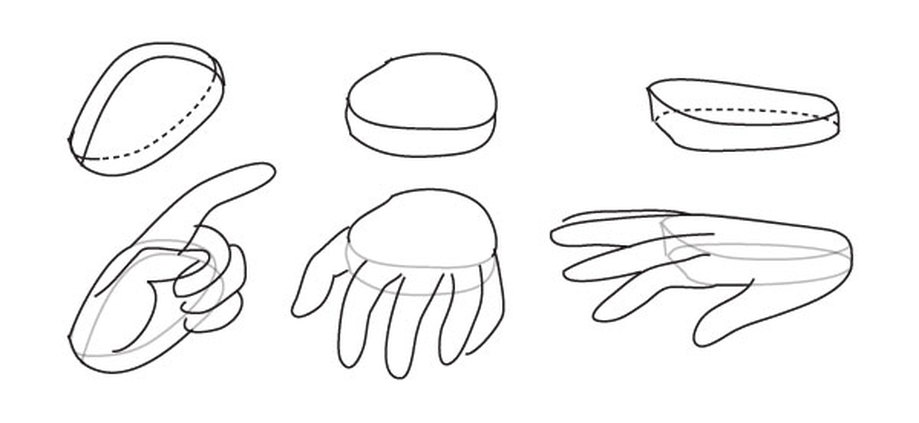
If you have a hard time drawing fingers, it’s very helpful to think of them, and draw them, as stacks of three cylinders. Cylinders are easy to draw under any angle, taking away much of the headache of drawing fingers in perspective. Observe how the bases of the cylinders are exactly the folds you need to draw when the finger bends.

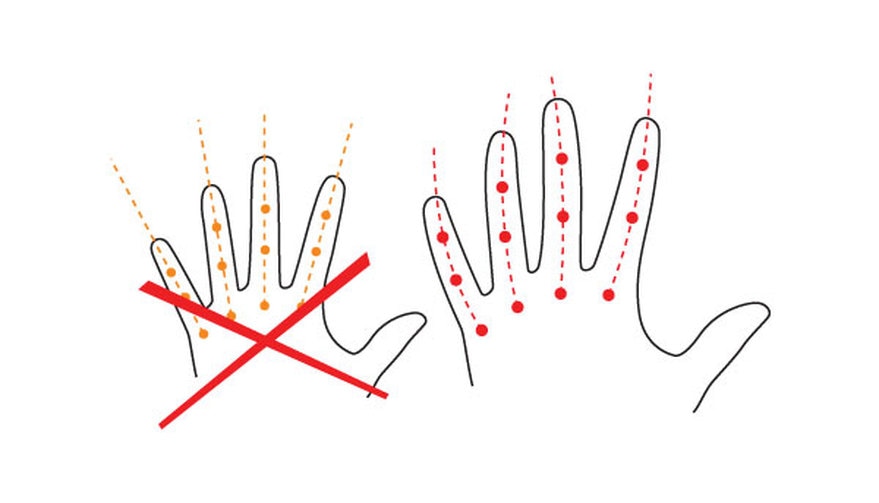
This is important: The joints of the fingers are not aligned on straight lines, but fall onto concentric arches:
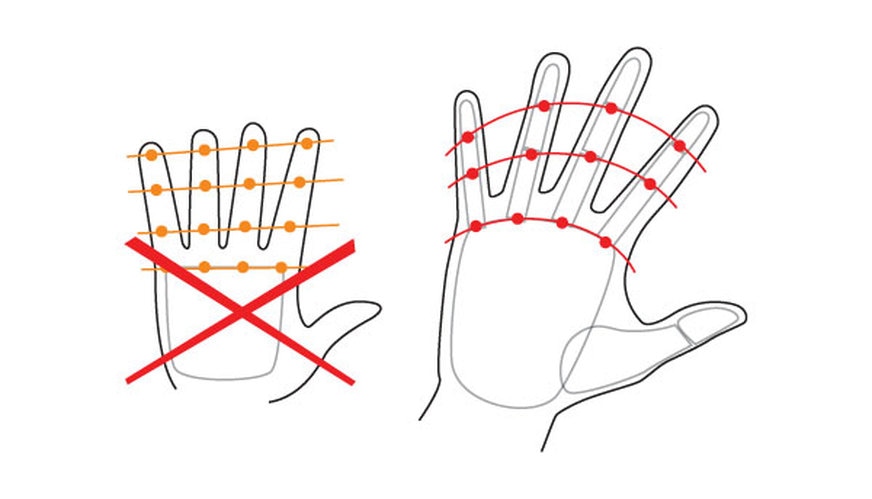
In addition, fingers are not straight, but bend slightly towards the space between Middle Finger and Ring Finger. Showing this even subtly gives life to a drawing:
Let us not forget the fingernails. There is no need to always draw them, indeed they are a degree of detail that only looks right when the hands are seen sufficiently close up, but we are not usually taught how they should look, and because of this, I for one couldn't make them look right for a long time. Here are some notes on the fingernail:
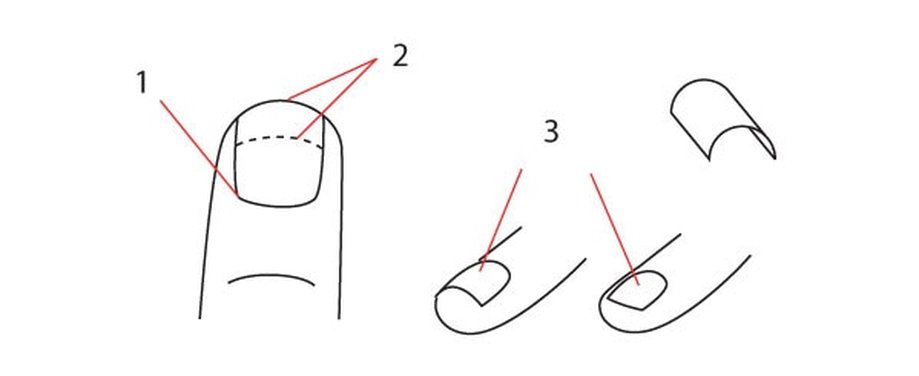
- The fingernail starts halfway up the top joint of the finger.
- The point where fingernail detaches from flesh varies: some people have it all the way at the edge of the finger, others have it very low (dotted line), so in their case the fingernails are wider than they are long.
- Fingernails are not flat, but shaped much like roof tiles, with a curvature ranging from extreme to very slight. Observe your hand and you may find that this curvature is different for each finger – but this level of realism is unnecessary in drawing, fortunately
Much more on hands from the original website link for this info: design.tutsplus.com/tutorials/human-anatomy-fundamentals-how-to-draw-hands--cms-21440
