Q4: Block Printing Aim, Objectives, and Vocabulary
Aim: Create a 3 color Block Print using the Reduction Print technique
Objectives:
"Students will be able to..." or (swbat)
1) ...transfer their design to a rubber carving block using pencil (Soft Kut material available at http://www.dickblick.com/products/soft-kut-printing-blocks/) and then pen to make it permanent.
2) ...learn techniques and tips from studying the block printing videos featured on this website (video worksheets will be completed)
3) ...create a colored drawing to plan the color scheme, order of printing which colors first, plan the order of cutting away material.
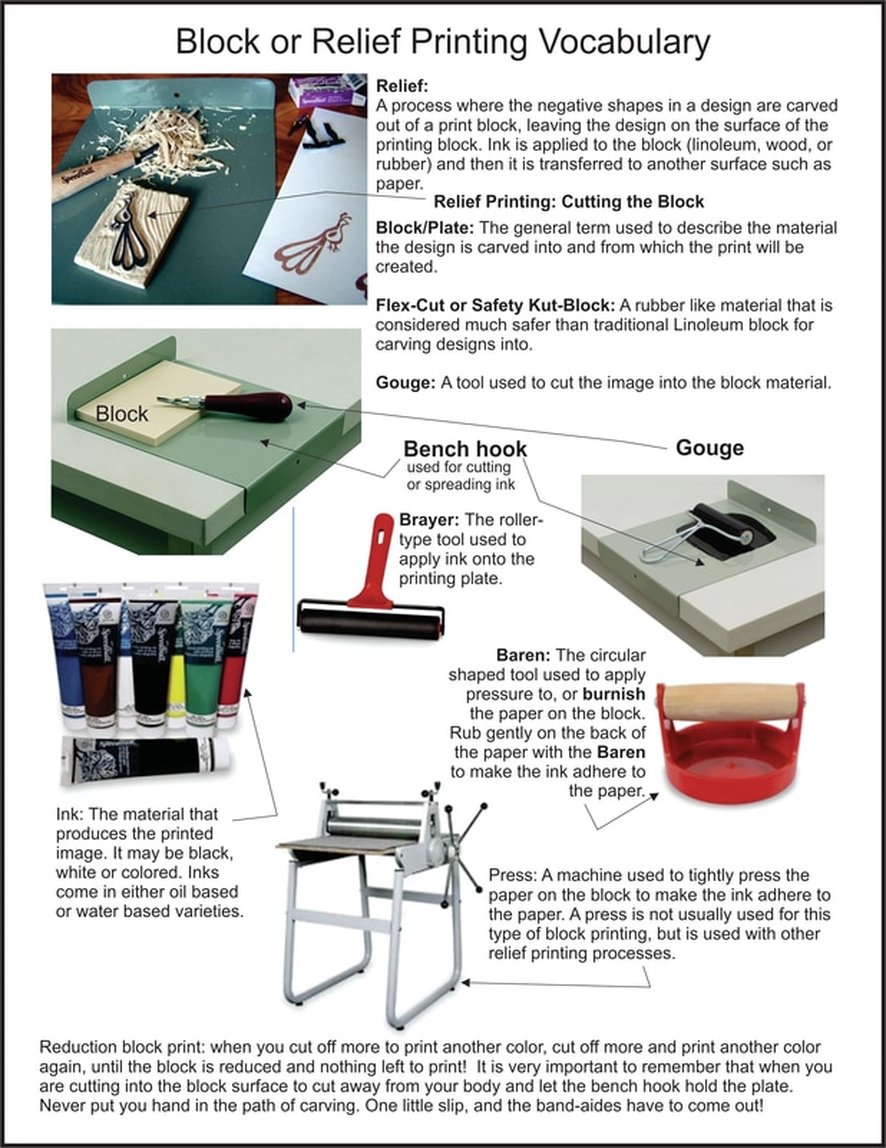
4) ...use the “V” and the “U” gouges correctly to cut away what will remain white
5) ...keep their gouges sharpened using a sharpening block and oil to result in clean lines, less mistakes, extremely sharp detail
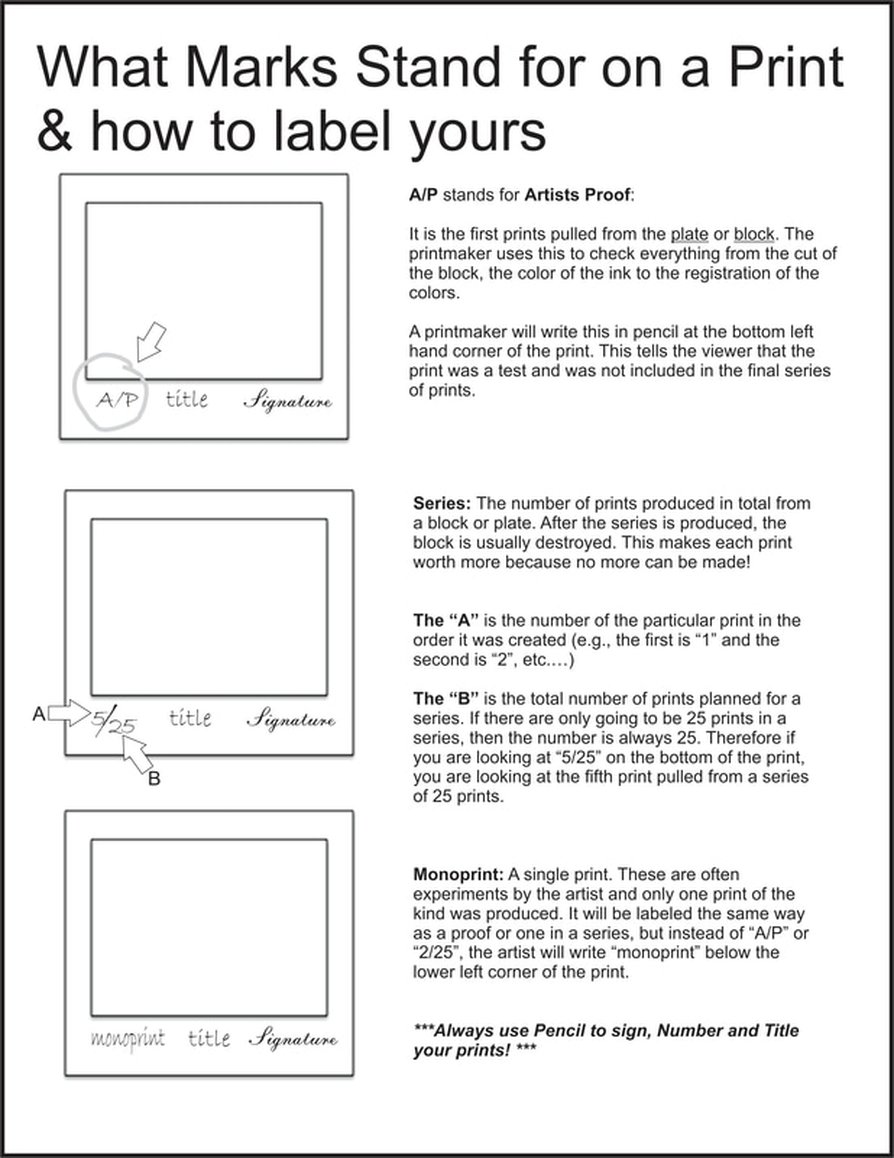
6) ...print their block cut design on plain white paper creating an Artist’s Proof, assess their own progress, and make any cutting revisions necessary or improve their technique of printing
7) ...use the benchhook, brayer and washable printing ink to neatly and evenly coat the rubber block to create 15-20 prints of their 1st layer of their lightest color (lightest to darkest), burnishing firmly, carefully and evenly
8) ...neatly print their name beneath the work and number prints as professionals do: 1/15, 2/15, 3/15, 4/15, all the way up to 15/15.
9) ...cut away more material from the block to prepare a 2nd printing using a 2nd color. (whatever is cut away will remain the first color)
10) ...print the second color
11) ...cut away material to prepare for the third color
12) ...print the third color
Variations to this project: Students could use less than 3 colors if the design is particularly challenging to cut, or if the concept of reduction printing stifles the students progress. Students could use more than 3 colors if the design is simpler to cut, or if the student is advanced and prefers a more detailed result.
2) ...learn techniques and tips from studying the block printing videos featured on this website (video worksheets will be completed)
3) ...create a colored drawing to plan the color scheme, order of printing which colors first, plan the order of cutting away material.
4) ...use the “V” and the “U” gouges correctly to cut away what will remain white
5) ...keep their gouges sharpened using a sharpening block and oil to result in clean lines, less mistakes, extremely sharp detail
6) ...print their block cut design on plain white paper creating an Artist’s Proof, assess their own progress, and make any cutting revisions necessary or improve their technique of printing
7) ...use the benchhook, brayer and washable printing ink to neatly and evenly coat the rubber block to create 15-20 prints of their 1st layer of their lightest color (lightest to darkest), burnishing firmly, carefully and evenly
8) ...neatly print their name beneath the work and number prints as professionals do: 1/15, 2/15, 3/15, 4/15, all the way up to 15/15.
9) ...cut away more material from the block to prepare a 2nd printing using a 2nd color. (whatever is cut away will remain the first color)
10) ...print the second color
11) ...cut away material to prepare for the third color
12) ...print the third color
Variations to this project: Students could use less than 3 colors if the design is particularly challenging to cut, or if the concept of reduction printing stifles the students progress. Students could use more than 3 colors if the design is simpler to cut, or if the student is advanced and prefers a more detailed result.
Vocabulary: